
Foundation Crack Repair Made Easy for Homeowners
If you’re a homeowner grappling with leaking cracks in your basement walls, take comfort in that you are not alone. This all-too-common issue plagues households far and wide, with foundation problems often topping the list of concerns discovered during home inspections. However, there’s good news amidst the worries: the same high-quality materials used by waterproofing professionals are now available to homeowners and DIY’ers in easy-to-use repair kits.
Now you can save money by repairing your basement wall cracks yourself. Permanently stop water leaks, soil gases (even radon gas), and bugs from entering your basement or crawl space. No special tools or equipment are needed. Step-by-step instructional videos will take you through the basement crack repair process. All you need is a caulking gun and a “can do” attitude.
Save Money By Repairing Basement Cracks Yourself
Repairing cracks in your basement or foundation is an important measure that can significantly improve the overall health of your home, and the livability of your basement. However, hiring a contractor to visit your home to repair a leaky basement crack can be costly and confusing. Most waterproofing professionals will charge $100-$200/linear foot to repair (often using our materials), while others will try to sell you an interior drainage system that will set you back $5,000 – $13,000.
Interested in saving money, the handier homeowner may choose to repair the crack themselves, only to learn that when repairing cracks in basement walls, caulk, hydraulic cement, and patching compounds are not long-term fixes. Caulks shrink and become rigid, eventually losing their bond with concrete. Hydraulic cement and patching compounds cannot tolerate subtle movements in the foundation, causing cracks, bond separation and continued water seepage.
There is a better alternative! Our polyurethane and epoxy crack injection kits have been used in the construction industry and by basement waterproofing contractors since 1997. The kits were so effective and easy to use that they became increasingly popular for homeowners and do-it-yourselfers. Our foundation crack repair kits require no special tools or skills and unlike cement-based crack fillers and patches, they work by filling the entire depth and length of a foundation crack to stop water leaks forever!
- Avoid Exterior Excavation – Save serious money by repairing the crack from the inside out.
- No Drilling Required – Low-pressure injection eliminates the need for drilling holes into the wall.
- Epoxy and Polyurethane Injection – Repair structural cracks or routine settling cracks.
- Fills Hairline Cracks – Low-viscosity urethane is ideal for repairing hairline cracks.
- No Special Tools Required – The repair kits ship complete. All you need is a standard caulking gun.


RadonSeal Basement Crack Repair Kits Work the Best
Our DIY basement wall crack repair kits use the same two-component polyurethane and epoxy as our professional toolkits for waterproofing contractors. These two-component injection polymers are used by practically all waterproofing contractors because the materials provide superior waterproofing results that last forever. The kits are user-friendly, and no special skills are required to do the job yourself. All that is required is patience and a couple of hours of your time.
Did You Know? Cheaper repair kits use single-component, hydrophilic foams that absorb water and eventually crumble after repeated drying.
Once our urethane has been injected into the crack, the proprietary, two-component polyurethane expands forcefully (2-4 minute reaction time), filling the entire depth and length of the wall crack with a closed-cell foam that repels water and will not break down. Once the urethane has cured, it will plug the void entirely and block backside water for a lifetime.
The DIY Basement Wall Crack Repair Kits feature single, internally split dual-component cartridges and mixing nozzles to ensure proper mixing during the injection process. Our kits ship complete and are ready for use once delivered, allowing you to fix cracks like a professional without having to pay a contractor to do it for you.
Learn How to Dry Out a Wet Basement
The urethane and epoxy kits allow homeowners to repair cracks like the Pro but at a much lower cost. Make repairs to a variety of concrete wall cracks:
- Underground Walkout Stairs (abutting the foundation)
- Narrow Cracks in Concrete Ceilings and Slabs
- Gaps between the Foundation Wall and Sill Plate
- Leaky Floor-To-Wall Joints (alternatively, you can use the ElastiPoxy Joint & Crack Filler Kit)
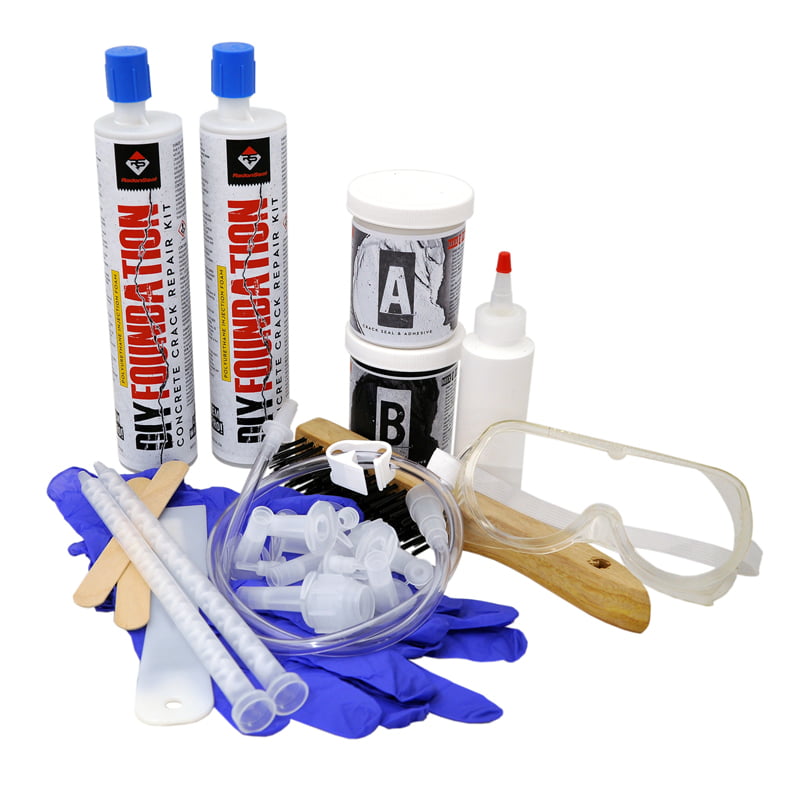
DIY Foundation Crack Repair Kit | Urethane
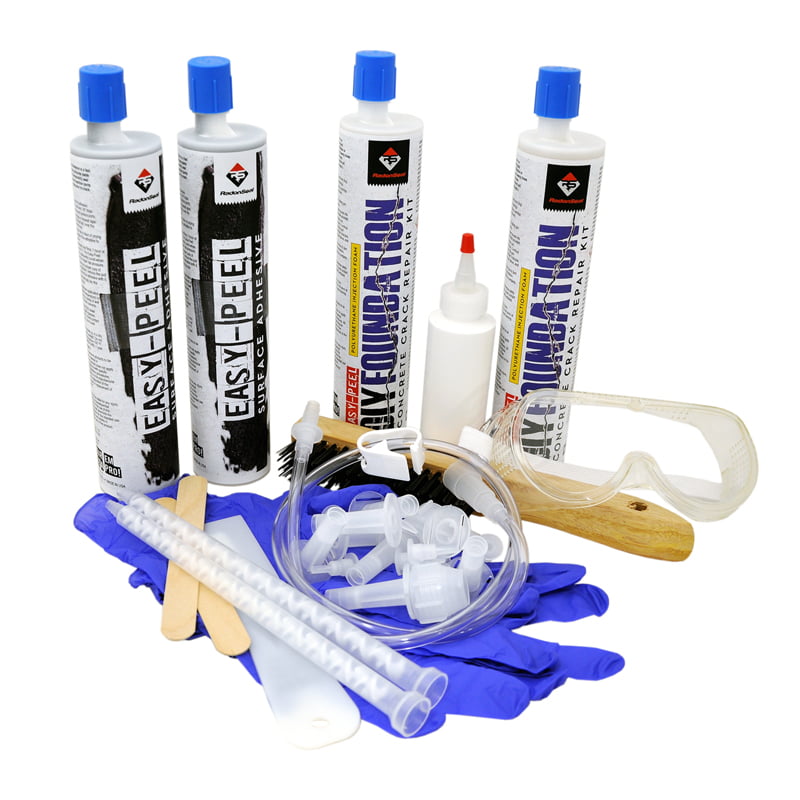
Easy-Peel DIY Crack Repair Kit | Urethane
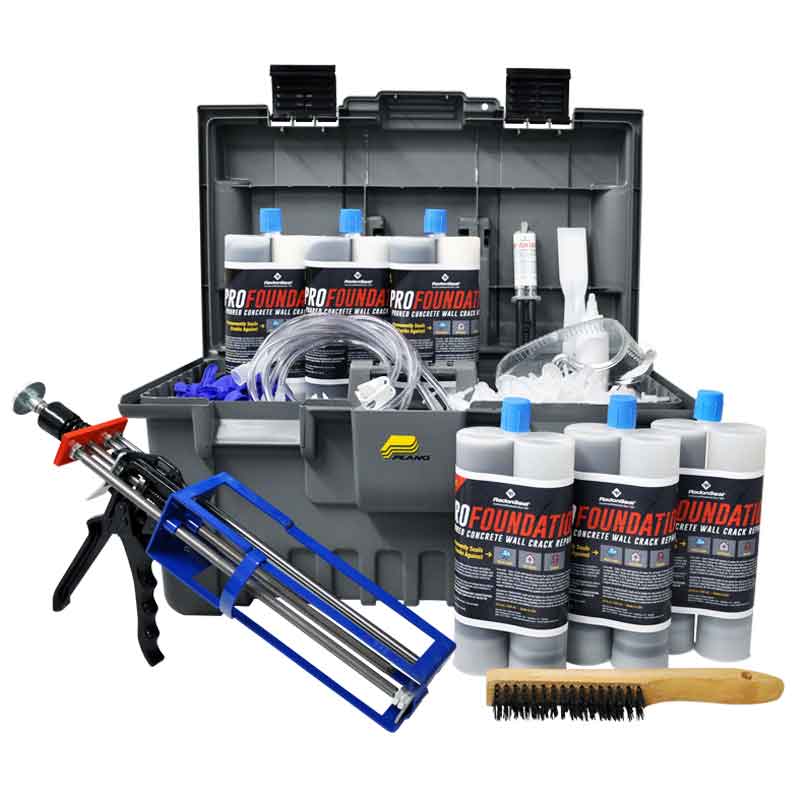
PRO Foundation Crack Repair Kit – Urethane
When to Use Polyurethane Injection
We recommend injecting polyurethane for sealing and waterproofing non-structural cracks in poured concrete walls. These low-pressure injection kits are best used: on wet, damp, or leaking cracks.
Originally, epoxy injection was developed for repairing cracks in large concrete structures. Since epoxy is stronger than concrete, it provides a structural repair. However, you cannot hold a house foundation wall together by “gluing” a moving structural crack. Another crack may soon develop.
Important! Structural cracks in basement walls are typically horizontal. If you have a crack that continues to move, please consult a structural engineer.
The majority of settling cracks in poured concrete foundations have already stabilized and simply need to be repaired, to prevent water from leaking through. Basement wall cracks are commonly vertical or diagonal. Many will start in the corner of egress windows. These types of cracks are best repaired using the expanding polyurethane polymer. The main reason polyurethane foam is used is because the foam remains flexible, allowing for the natural movement of concrete (expansion/contraction). Contact with water helps the urethane forcefully expand up to 20 times its volume filling the entire length and depth of the crack. Water will never be able to enter the wall crack again!
When to Use Epoxy Injection
Epoxy injection kits are recommended for repairing wider cracks (>1/4″) or when added strength is needed.
Injectable epoxy does not only stop water but also provides structural strength. Epoxy’s strength and its bond to the concrete exceed the strength of the concrete itself! Injecting epoxy prevents further elongation and “yawning” of the crack. However, if the underlying cause of the structural stress is not resolved, a new crack may develop right next to the repaired crack.
Did you know? This special hydrophobic epoxy is suitable for use inside damp cracks.
The epoxy injection kit includes single, two-component epoxy cartridges for crack injection. A single 10-ft kit fills a volume of 60 cu. in. – a crack 8′ long and on average 1/16″ wide in a wall 10″ thick (8’x12 x 1/16″ x 10″ = 60 cu. in.). Epoxy does not expand. It is suitable for hairline cracks, but if the crack is wider, it requires proportionally more epoxy. Epoxy cures slowly, and if there is a void behind the wall, epoxy will run out the backside.
Watch the Step-by-Step Guide to Repairing Foundation Wall Cracks
Watch the Step-by-Step Guide to Repairing Foundation Wall Cracks
Why Concrete Basement Walls Crack
Cracks in basement walls typically form because of one or more of the following:
- Shrinkage of the concrete during curing
- The movement caused by soil shifting/settling
- Hydrostatic pressures that build after rain or in saturated zones, and areas with high water tables
- Tree root incursion into the foundation
- Shoddy concrete due to incorrect mixing/curing
Why Foundation Cracks Should be Repaired
Foundation cracks serve as direct pathways from the soil around your basement into your home. If a concrete crack appears on the inside of your foundation wall, it is very likely that the exterior waterproofing membrane is also damaged. As a result, humid musty air, bugs, soil gases (including radon), and water, can pass freely through these areas into your basement. If your basement cracks are not leaking water now, it is only a matter of time before they do.
If they are currently leaking, you can expect the problem to become worse, as water will continue to erode the soil outside your wall, further increasing water flow inside.
Tips for Repairing a Leaky Basement Wall Crack
Practice Patience – During the injection process, use low-pressure injection by slowly squeezing the trigger of the caulk gun, then releasing the pressure. Using only about 20 lbs. of pressure allow the polyurethane to penetrate hairline cracks and for the foam to expand. Spend about 2-4 minutes injecting into each surface port.
Hairline Cracks – Heating the cartridge lowers the polyurethanes viscosity further and makes the injection easier into hairline cracks. Fill a pot with hot water and submerge the urethane cartridges for about 15 minutes.
Corner Cracks – When selecting a kit, there is an option to choose from flat or corner surface ports.
Actively Leaking Cracks – To use low-pressure injection, you must wait for the leak to stop before repairs can be made. Running water prevents the surface sealer, as well as the injected polymer, from adhering properly to the leaking area. Or, hire a contractor who can use the high-pressure injection method.
Above-Grade Cracks – If there is a void on the other side of the crack, the polyurethane foam would wastefully expand into the air. Seal the other side of the crack first with a concrete patching compound, caulk, or the epoxy surface adhesive supplied to you in the kit.
Multiple Cracks – If you have more than 20 linear feet of basement wall cracks, it will be economical to use our Professional Foundation Crack Repair Toolkits. Our PRO kits include a professional dual-caulking gun, which makes injection an even easier process.
PipeTite Gap Filler Kit – Repair Leaking Pipe Penetrations and Form Ties
The size of the holes drilled through foundation walls is always a size larger than the pipes and workers just stuff some mortar into the void. Over time, the mortar will inevitably deteriorate and start leaking water. These recurrent water leaks are an endless nuisance to many a homeowner. Hydraulic cement does not stick to pipes and caulk will get loose.
The PipeTite Gap Filler Kit provides a permanent solution for pipe penetrations through poured concrete walls. It is very similar to the D-I-Y Foundation Crack Repair Kit but smaller. The polyurethane foam tenaciously adheres to concrete, plastic, and metals. It beats caulking, mortar, hydraulic cement, or patching compounds. It will never separate, peel, or leak – it is permanent!
The expanding polyurethane will fill the entire gap around the pipe and water will never get in again. It also protects the concrete by preventing water from getting inside the gap. All you need is a common caulking gun.
Application is very similar to crack injection:
First, glue one or more injection ports around the pipe and enclose the gap with the surface sealer. Let cure and inject the polyurethane polymer, which forcefully expands and fills the entire void with polyurethane foam. In case there already is solid mortar, you can drill holes through it with a masonry bit and inject the polyurethane
sealant through it.
Form wire ties: These steel wires or rods hold the forms together when foundation walls are poured. But once the exterior waterproofing breaks down, water attacks the form ties, making them rust or fall out. Water starts squirting into the basement. Caulking or patching are only temporary fixes. Glue an injection port right on top of the hole and inject the PipeTite expandable urethane to fill the void and stop the leak permanently.